How To's: AI Augmented Sky in Luminar 4
- Dale Lauterback

- Nov 26, 2023
- 2 min read
Updated: Jul 26, 2025

Scenario: You have a landscape photo of an open area and you want to replace the background with a more dramatic background. You could use Photoshop, but either you don't know how or you know it will take some time to replace the background. Skylum's Luminar 4 can do all this in a matter of minutes with the AI Augmented Sky in Luminar 4 feature. You also have instant results to try other backgrounds to see what fits best with your image.
1) Open Skylum's Luminar 4 and click on the "+" icon to either add a folder or an individual photo to edit.

Note: Luminar 4 is also great for making other photo enhancements like; Adjusting lighting, and color, or using built-in filters. But we will cover that later in another post.
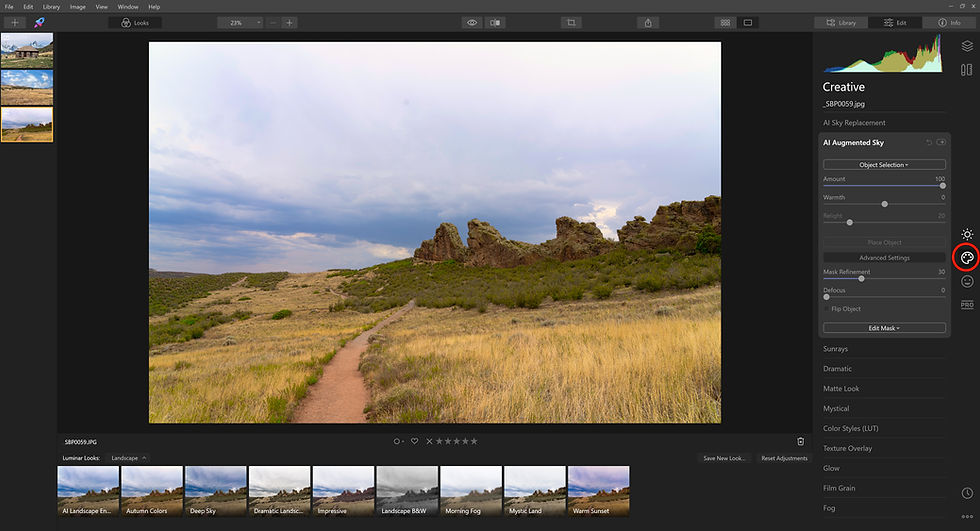
2) Now that you have your photo open, click on the "Creative" Icon on the right side.

3) Select "AI Augmented Sky"

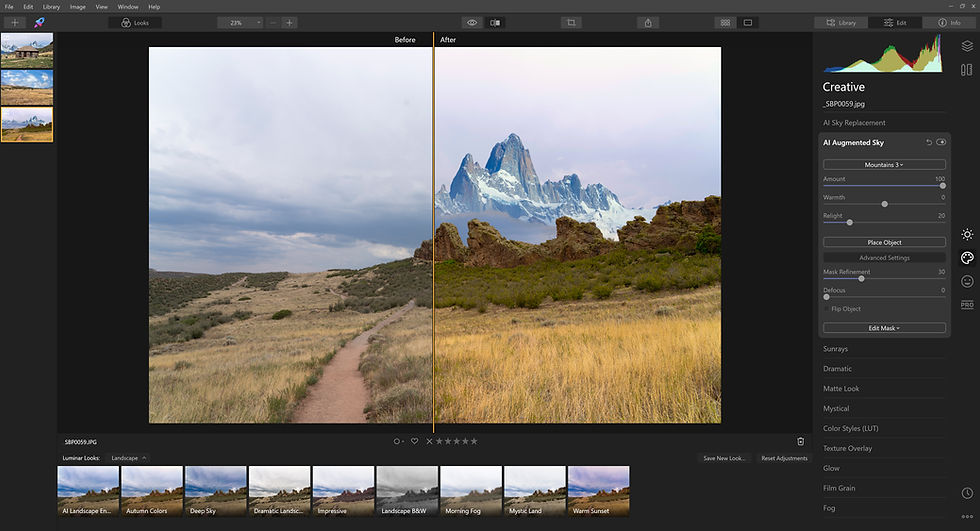
4) Select "Object Selection" In my case the client wants a dramatic mountain range in the background. There are 4 built-in choices for "Mountains", you can select each one to see how it looks. If the included "Objects" doesn't include something you are looking for you can Select "Load Custom Image".

5) The software does a great job of replacing just the sky/background, but sometimes there is overlap which you can adjust by selecting "Edit Mask". Most of the time the "Brush" is the best tool for adjustments.

6) With the "Brush" tool selected, select "Erase" in the top menu bar. This will allow you to remove any overlap from your image.

Note: Select "Mask" to see your adjustments. You can also select "Size" to adjust the brush
7) Once you are happy with your edits select "Done"

8) To save your work select "File" and "Export"


Skylum's Luminar 4 is no longer available. But they have a new version, Luminar Neo which does the same thing with a few more features.


Comments