
How To's: Add Sunrays to enhance your Photo in Luminar 4
- Dale Lauterback

- May 12, 2022
- 1 min read
Updated: Aug 19, 2025

Scenario: You hiked miles on a cold windy spring day hoping to catch a beautiful sunset only to be disappointed with your results. Not all sunsets or sunrises will go the way you want to, but there is a way to make the photos you did take work with Luminar. In this case, we are going to add some sun rays to improve our shoreline sunset.

1) Open Skylum's Luminar 4 and click on the "+" icon to either add a folder or an individual photo to edit.

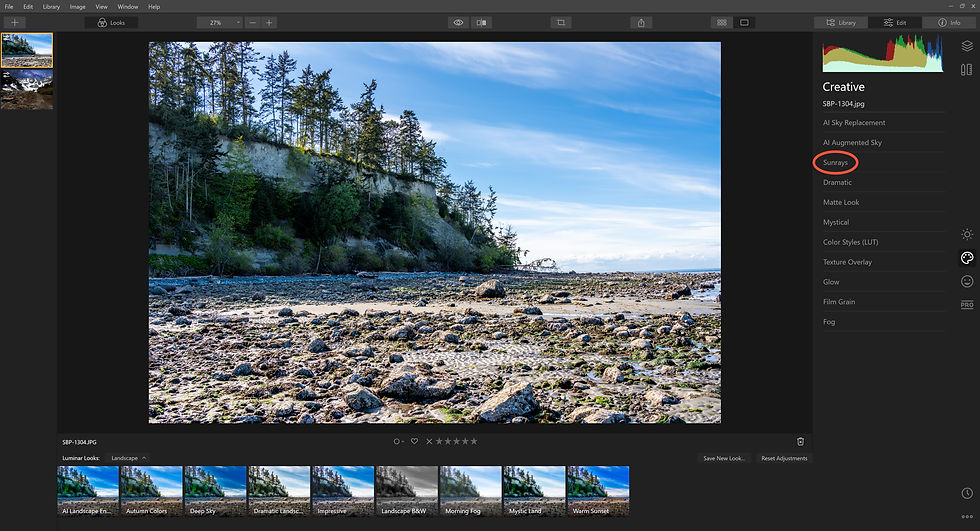
2) Now that you have your photo open, click on the "Creative" Icon on the right side.

3) Select "Sunrays"
4) Click on "Place Sun center". A white dot will appear. If your image has the sun in it then you would place the white dot on the sun. If the sun is hidden like in this case you would place it where it would line up with the lighting in your photo.

5) Now we need to adjust the "sun" to match the scene and your preference. Click on "Advanced Settings" to adjust both the "Sun Warmth" and the "Sunrays Warmth"

6) Once you are happy with the coloring, you can now adjust the size of the sun and rays. These settings adjustments would be based on your preferences.

7) Once you are happy with your edits select "Done"
8) To save your work, select "File" and "Export"

If you don't own Skylum's Luminar 4, use this link to download a trial version.


Comments