
How To’s: Isolate a Subject and Adjust the Background in Adobe Lightroom
- Dale Lauterback

- Apr 21, 2022
- 1 min read
Updated: Aug 19, 2025

Scenario: You have a photo you took of a subject and you are happy with how the subject turned out but the background is either too busy or just not doing it for you. You want to be able to isolate your subject and just edit the background. This tutorial will show you how.
1) With Adobe Lightroom Classic (v11) open and your image selected, click on “Develop”

2) Do your edits to the photo that you want first. Like adjusting the color, exposure, contrast, crop, etc. See our other post on Enhancing Photos in Lightroom
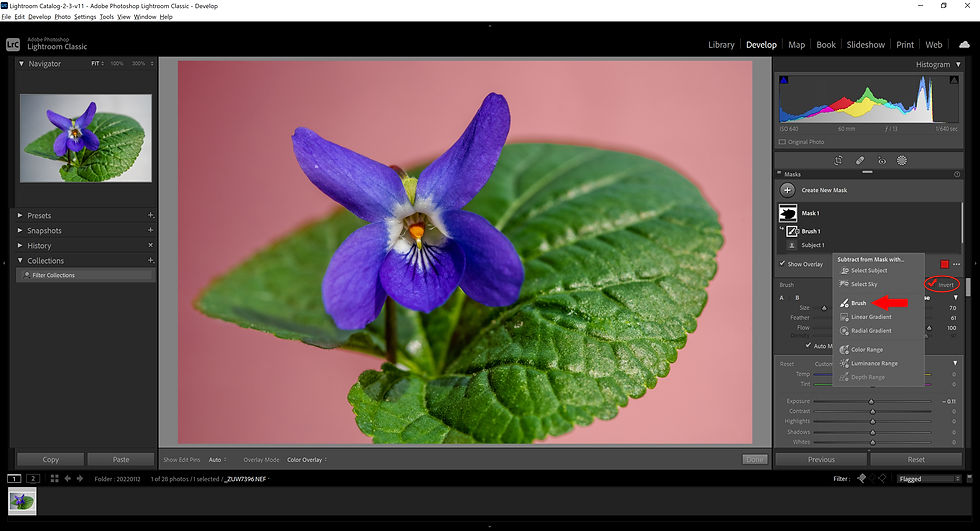
3) Click on the Masking tool then “Select Subject”.

This tool will try to automatically select and highlight in red (default color) the subject it thinks you want. Sometimes this isn't always correct or sometimes it won't get all of your subject or too much.

If this happens, you can then click on the “Add” or “Subtract” buttons and then “Brush” to modify the selection. Before you do this, be sure to check the “Invert” box.
Once you have the complete background highlighted in red, you can now start making your adjustments. Drag the Exposure adjustment all the way to the left. You will then repeat this same step with Highlights, Shadows, Whites, and Blacks. Now your background should be completely Black.
Note: if you are not seeing the changes appear, you may need to uncheck “Show Overlay”


Comments