
How To's: Enhancing Your Photo Using Luminar Neo Supersharp AI
- Dale Lauterback

- Aug 28, 2025
- 1 min read

In the world of photography, sharpness can make or break an image. Whether you're dealing with a slightly soft wildlife shot, a motion-blurred landscape, or simply want to bring more detail to your subject, sharpening tools can be essential—but not all are created equal. Luminar Neo’s Supersharp AI is changing the game by using artificial intelligence to analyze and enhance your photos with stunning precision.
1) Open Skylum's Luminar Neo and click on the "Add Photos" icon to either add a folder or an individual photo to edit. Select "Add Image" to just add one photo

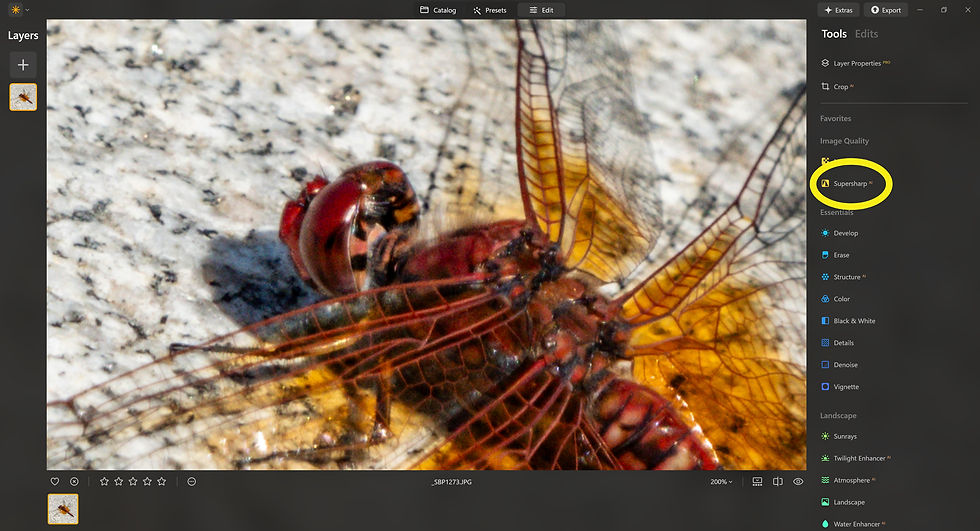
2) Now that you have your photo open, click on the "Edit" Icon on the Top.

3) Select "Supersharp"
4) You now have a few choices depending on your photo and how sharp you want it. I normally don't photograph people, so I won't select Face Enhancer, but I will select "Universal" because my subject isn't moving and I will go with "Middle."

5) The AI Sharpening process will start on your photo and could take some time depending on the size of your image.

6) Once the process is complete, you can select the Before and After icon to see the changes

7) To Save Your Newly Sharpened Image, select "Export" then the format you would like.

Final Results - Before and After


If you don't own Skylum's Luminar Neo, use this link to download a trial version.


Comments